Immediate Steps for Handling a Water Heater Leak
Turn Off the Water Supply
Acting swiftly to stop the water supply is crucial when you spot a leak in your water heater, as it helps prevent excessive water loss and mitigates damage. The cold-water shut-off valve, typically mounted above the heater, should be your first target. Twist this valve clockwise until it stops moving, ensuring it’s completely closed.
If the valve malfunctions or you can’t reach it, you’ll need to locate and turn off the main water valve for your home. This valve is usually positioned where the main water line enters your home, such as in a basement, crawlspace, or utility closet. Note that shutting off this main valve will cut off the water supply to your entire household.
Should you encounter a valve that’s corroded or challenging to turn, avoid applying excessive force to prevent further damage. In these instances, or if you’re uncertain about how to locate the shut-off valves, it’s wise to seek immediate assistance from a water heater repair specialist or a plumber. They can help ensure your home is protected from additional water damage. Once the water supply is securely turned off, you can proceed with the next steps in a safer environment, preventing more water from entering the tank and potentially worsening the leak. When dealing with shut-off valves, exercise caution and don’t hesitate to call for professional help if needed.
Turn Off the Power Supply
Once you’ve halted the water flow, the next immediate action is to deactivate the water heater’s power source. For those with electric models, this means heading to your home’s circuit breaker panel and flipping off the breaker linked to the water heater. This step is vital to eliminate any chance of electrical shock.
Owners of gas water heaters should locate the gas shut-off valve, usually found on the gas line that runs to the tank. Rotate the valve until it forms a T with the line, effectively sealing off the gas supply. Before you proceed with any further steps, double-check to ensure that the power or gas supply is indeed disconnected.
It’s crucial to avoid any contact with the water heater’s electrical components, especially if they are damp or if you’re standing in water. Under such circumstances, it’s best to err on the side of caution and enlist the expertise of a professional. Cutting off the power supply not only safeguards you but also prevents potential damage to the heating elements that could result from an empty tank while still powered.
Identify and Document the Leak
With the power safely off, it’s time to pinpoint the source of the leak. Start by drying off the tank and its connections. This will help you spot any new signs of leakage. Begin your inspection at the top of the water heater and work your way down, as leaks can mislead by tracking along surfaces.
Examine common leak origins such as the inlet and outlet connections, the pressure relief valve, the tank itself, and the drain valve. Upon discovering the leak’s source, make a detailed record of its characteristics—note whether it’s a minor drip or a more significant flow, and the exact location.
Capturing the leak on camera or video can be incredibly helpful. Try to get clear, well-lit shots from multiple angles to assist the repair technician in preparing for the job ahead. These visuals can also be indispensable for any warranty or insurance claims you may need to file.
It’s important to resist the urge to fix the leak yourself unless you have the necessary expertise. DIY repairs can sometimes lead to more extensive damage or affect warranty terms. Instead, prepare to convey your findings to T&J Rooter Service, who can provide the appropriate professional repairs for your water heater.
Assessing the Situation
After documenting the leak as outlined earlier, it’s crucial to evaluate the circumstances to decide your next steps. Begin by gauging the leak’s intensity. Is it a minor trickle or a forceful stream? The volume of water being released is a key indicator of the urgency with which you need to act to mitigate potential damage.
Moving on, pinpoint the origin of the leak. The location of the water can hint at different potential problems. For example, moisture around the top might point to issues with the inlet or outlet connections or a malfunctioning pressure relief valve. Conversely, pooling water at the unit’s base could signal tank corrosion or a defective valve, which might be more severe.
Consider any additional factors that could exacerbate the situation, such as proximity to electrical devices or structural materials in your home that could be compromised by ongoing exposure to water.
It’s also time to check on your water heater’s warranty and insurance coverage, which will be detailed subsequently. Verify if your warranty is valid and if it encompasses the type of leak you’re facing. Scrutinize your homeowner’s insurance to see if it includes water damage from appliance leaks.
This preliminary evaluation is critical for effective communication with repair professionals and will guide the decision between repair or replacement, topics we’ll explore later. The information you compile now will also be invaluable for any insurance or warranty claims.
Ensure this assessment is conducted with caution and safety in mind, following the shutdown of both power and water supply to the heater to eliminate any risk of harm.
Determine the Severity and Source of the Leak
Assessing the severity of the leak requires a keen observation of the water’s flow and its immediate effects on the environment. A small, steady drip suggests a less critical situation, while a substantial, uncontrolled flow indicates a more pressing issue that demands swift action.
To trace the source, conduct a thorough examination of the water heater’s components. Areas to inspect include:
- The tank itself, where corrosion may have taken hold.
- The pressure relief valve, which could be releasing water due to overpressure or a defect.
- The drain valve, which might be improperly seated or compromised.
- The water supply lines, where weakened connections could be failing.
- For electric heaters, the heating element gaskets, which, if defective, could allow water to escape.
Discerning the origin of the leak sheds light on the problem’s nature. A fitting that’s simply come loose may only need tightening, whereas a tank leak often points to a more grave issue like corrosion, potentially necessitating a full replacement.
Tackle this step with a systematic and safe approach, as previously emphasized, only after ensuring that the water and power are disconnected. If there’s any hesitation about your ability to identify the leak’s source or severity, or concern about causing additional damage, it’s best to wait for a professional’s assessment.
The insights gained from this step are pivotal for the forthcoming phases, including enlisting professional help, preparing for their visit, and managing the leak in the interim.
Review Warranty and Insurance Coverage
Before you proceed with any repairs, it’s crucial to understand the financial safeguards you may already have in place. Start by examining your water heater’s warranty. Manufacturers typically offer a warranty that may cover the tank and components for a specified duration. Verify if your warranty is valid and what components or malfunctions are included. Should the leak’s origin, such as a defective pressure valve or a compromised tank, fall under warranty, you might be eligible for a complimentary repair or a replacement unit.
Be mindful that warranties have specific conditions, and unauthorized repairs could invalidate your coverage. Confirm that the actions you’ve taken, including the water and power shutdown, align with the warranty’s requirements.
Next, scrutinize your homeowner’s insurance policy. It often doesn’t cover the appliance itself but may cover damage caused by the leak to your home. If the leak has resulted in substantial water damage or loss of property, your policy may be a lifeline. Grasping the extent of your coverage is pivotal for a proper insurance claim, should it be necessary.
Gather all pertinent paperwork, such as the purchase receipt, maintenance records, and warranty documents. If you’ve followed previous advice and documented the leak and its impacts, include this evidence when liaising with your insurance provider or the manufacturer.
A clear understanding of your warranty and insurance situation will guide your next steps, ensuring you leverage any available financial protections as you navigate the repair or replacement process.
Preparation for Repair or Replacement
With a thorough understanding of the leak’s nature and your financial coverage in hand, it’s time to get ready for professional intervention. Should the issue be beyond a simple fix, like a corroded tank, reaching out to a seasoned water heater specialist is advisable. Choose a service provider with a solid track record, proper licensing, and positive customer feedback. Prompt and courteous customer service is also a key indicator of a reliable service provider.
Before the technician’s visit, make their job as seamless as possible by clearing the vicinity of the water heater. Ensure that any objects that could hinder access are removed. If the unit is tucked away in a tight spot, like a closet, make space by relocating nearby items.
Prepare a list of queries you have and compile any relevant documents for the technician, including warranty details and records of past repairs. Having this information at hand will facilitate an in-depth discussion about the water heater’s past issues and the current predicament.
In the event that a new water heater is the recommended course of action, weigh your options regarding size and energy efficiency. This juncture is an opportunity to evaluate if a different model could better serve your household’s needs.
After the repair or installation, make sure you’re provided with a comprehensive rundown of the work performed and maintenance tips for the future. This knowledge is invaluable for prolonging the lifespan of your water heater and will be a useful reference for later maintenance discussions.
Lastly, if a new unit has been installed or significant repairs have been made, update your home inventory for insurance purposes and retain a record of the completed service for future reference.
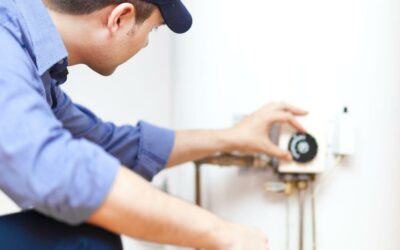
Contact a Professional
After pinpointing the leak and gauging its seriousness, it’s often prudent to seek the expertise of a professional. This step is crucial, particularly when the issue transcends basic fixes such as securing a loose connection. A professional’s involvement is paramount to preserve the water heater’s functionality and to mitigate any potential safety hazards that could arise from amateur repairs.
Seek out a licensed plumber or a certified technician with a background in water heater services. To ensure you’re choosing a reliable expert, peruse online customer feedback or solicit referrals from acquaintances who have required similar services.
When you reach out to a professional, arm them with ample information about the leak. Share the water heater’s brand and model, describe the symptoms, and mention any preliminary actions you’ve taken, like turning off the water and electricity. This information equips them to arrive well-prepared with the appropriate tools and components.
It’s also wise to request an initial cost estimate during your call and to ask about any guarantees they provide on their workmanship and the parts they might replace. Arrange an appointment that aligns with your schedule, keeping in mind the urgency that the leak’s severity dictates.
Before concluding the call, verify if there are additional steps you should take prior to their arrival to ensure a seamless and secure repair process.
Prepare for the Professional’s Arrival
Facilitating a smooth and efficient repair or replacement service begins with your preparation for the technician’s visit. Start by decluttering the area around the water heater. This not only provides the technician with ample space to operate but also safeguards your belongings from potential harm.
Ensure that the pathway leading to the water heater is free from any tripping hazards, such as loose rugs or household items, and keep pets in a separate area. Adequate lighting is essential for a meticulous inspection; if the current setup is lacking, consider arranging additional light sources.
Have all pertinent documentation at the ready, including warranties, past service records, and the unit’s identifying details. These documents can prove invaluable during discussions about repair or replacement options.
If you’ve captured images or video of the leak, present these to the technician. Visual evidence can offer additional context and aid in diagnosing the problem more accurately.
Finally, make sure someone is available during the appointment who is familiar with the water heater’s history and can field any inquiries the technician might have. This person’s presence can be instrumental in addressing the issue effectively and without unnecessary delay.
Temporary Leak Management
In the interim before a specialist arrives, it’s crucial to mitigate the water heater leak to avert further damage and potential safety risks. This interim solution is not meant to replace professional repair but to serve as a bridge to it.
Start by positioning receptacles beneath the leak to collect the escaping water. Should the volume of the leak be significant, make sure to regularly empty these vessels to prevent them from spilling over. Surround the heater with absorbent materials like towels to soak up any excess water, reducing the possibility of water damage and the chance of slipping.
For minor leaks emanating from valves or connections, if you’re comfortable with the task, you might try gently tightening them to lessen the water flow. Exercise caution to avoid exacerbating the issue through excessive force. Refrain from using makeshift seals such as tape or adhesives, as these can cause a dangerous buildup of pressure within the system.
Keep a vigilant eye on the leak, as persistent moisture can lead to the growth of mold or cause structural harm, even with temporary measures in place. Ensure the area is well-ventilated, particularly if you have a gas water heater, to prevent the accumulation of fumes.
Bear in mind, these are only provisional steps to control the leak until you can secure professional repair services. Proceed with the previously outlined steps to engage a qualified technician for a comprehensive evaluation and resolution of the issue with your water heater.
Contain the Leak
Effective containment is essential in limiting the spread of water from a leaky heater and safeguarding your surroundings. Utilize watertight vessels such as buckets or pans to capture the water directly at its source, be it from the pressure relief valve or where the tank joins.
If the leak is more severe, or you’re unable to attend to the containers regularly, consider a broader containment approach. Deploy plastic sheeting or waterproof tarps around your heater to shield your flooring and channel the water toward a drain or collection point.
Employ absorbent materials like towels or mats at the base of the heater to mop up any stray moisture. Take special precautions if the leak is in proximity to electrical outlets or devices to avoid the risk of electrical hazards.
After setting up your temporary containment, monitor it to ensure it’s effective and make any necessary adjustments. Keep in mind that while these measures are useful in the short term, they are not a replacement for professional repair, which should be sought promptly.
Always prioritize your safety. If the situation seems beyond your control or you’re uncertain about how to manage the leak safely, it’s advisable to step back and leave the task to the professionals, who are equipped with the knowledge and tools to handle the situation securely.
Maintaining Your Water Heater Post-Leak
Once you’ve successfully navigated the choppy waters of a water heater leak, it’s essential to pivot towards a regimen of upkeep to safeguard against future complications. Instituting a routine of regular checks and balances is not only prudent but can significantly enhance the longevity of your appliance.
Embark on this journey by instituting a monthly visual inspection. Cast a discerning eye over the unit, scouting for any subtle indicators of wear such as rust or moisture around the fittings, the pressure relief valve, and the tank’s foundation. It’s equally important to maintain a clutter-free zone surrounding your heater, ensuring any irregularities are immediately apparent and accessible for rectification.
An annual flush of your water heater’s tank is a cornerstone of this maintenance ritual. This purge of sediment is instrumental in maintaining optimal performance and staving off potential leaks. Concurrent with this task, take a moment to examine the anode rod, a stalwart defender against corrosion. Should you discover it significantly depleted or cloaked in calcium deposits, it’s time for a replacement.
The temperature and pressure relief (TPR) valve warrants an annual test as well. This critical component is designed to avert excessive pressure build-up. If a test fails to trigger a release of water, or if leakage persists post-test, enlist a professional for replacement.
Temperature regulation is another facet of maintenance. A thermostat setting around 120°F strikes a balance between safety and energy efficiency. For those with an insulating blanket or cover, periodic checks are necessary to confirm its integrity.
Documenting all maintenance and repairs is a sage practice, providing a valuable log for warranty and servicing purposes. By embracing these proactive steps, you’re not only bolstering the efficiency of your water heater but also mitigating the likelihood of future leaks.
Regular Maintenance and Inspection
Embracing a proactive stance on water heater upkeep is the linchpin to ensuring its optimal operation and longevity. An annual professional inspection is a wise investment, offering a thorough review of the system’s health and addressing tasks that may be beyond the homeowner’s expertise.
A technician’s scrutiny during these visits is extensive, encompassing an evaluation of the tank and its connections, a verification of the pressure relief valve’s performance, and a search for any nascent leaks or rust. They’ll also confirm that the thermostat is dialed into an energy-efficient and safe setting.
For those with tank-based systems, the professional’s agenda will include a descaling flush to combat sediment accumulation—a common culprit in efficiency decline and corrosion. Attention will also be paid to the anode rod, with recommendations for replacement if wear is evident.
Gas water heater owners can expect an examination of venting systems to ensure unobstructed exhaust flow and a review of the burner assembly and ignition systems for safe and effective operation.
While professionals play a pivotal role, homeowners are not mere bystanders in this process. Vigilance in observing the system, maintaining a tidy heater environment, and heeding any shifts in performance or sound can be instrumental in early problem detection.
A steadfast commitment to maintenance and inspection is the bulwark against unforeseen malfunctions and inefficiency, ultimately translating to savings on utility expenses and circumventing exorbitant repair costs.
Anode Rod Inspection
The anode rod plays a pivotal role in safeguarding your water heater tank from corrosion. This component, often called the sacrificial rod, is designed to deteriorate over time to protect the tank from rust. It’s essential to inspect the anode rod at regular intervals, ideally as part of your yearly maintenance routine, to ascertain whether it requires replacement.
While a general guideline suggests a three-year interval for inspections, factors such as water quality and heater usage may necessitate a more frequent examination. For example, hard water can expedite the corrosion process, shortening the rod’s lifespan.
A technician inspecting the anode rod will assess its condition for signs of significant wear. Although an anode rod can last up to five years, this duration is not set in stone and can vary. Indicators that the rod needs replacing include over six inches of the core steel wire being visible or a heavy buildup of calcium.
Replacing the anode rod is a forward-thinking measure to avert leaks and extend your tank’s longevity. Given the complexities involved, such as handling high-temperature water and potential gas or electric connections, this task is best left to the expertise of professionals. They will ensure a safe and correct installation, mitigating any hazards associated with improper procedures.
The choice of anode rod material—be it aluminum, magnesium, or zinc—also influences its durability and should be selected with your water’s mineral composition and the manufacturer’s guidance in mind. Engage with your service provider to pick the most suitable type for your system, ensuring compatibility with the local water conditions and the optimal functioning of your water heater.
Regularly scheduled inspections and timely replacements of the anode rod are minor yet essential steps in maintaining your water heater, helping you avoid more significant expenses or the need for an early unit replacement.
Evaluating Repair or Replacement Needs
Confronted with a malfunctioning water heater, the choice between repair and replacement hinges on several factors. The age of your appliance is a primary consideration; most units are designed to last between 8 to 12 years. If your water heater is nearing or has exceeded this timeframe, especially if it’s prone to recurrent malfunctions or has sustained a major leak, opting for a new model might be the more economical route.
Modern water heaters boast enhanced efficiency, which can translate into considerable energy savings over time. This efficiency can offset the initial investment in a new appliance. Additionally, if your current unit falls short in meeting your household’s hot water demands, an upgrade to a more suitable size or a tankless water heater could enhance your daily comfort and convenience.
Reflect on the history of repairs your water heater has required. Frequent or expensive fixes could indicate that it’s time to replace the unit. A useful benchmark is the 50% rule: if repair costs approach half the price of a new water heater, investing in a new unit is likely the wiser choice.
Updates in safety regulations and building codes may also influence your decision. Standards that were acceptable at the time of your water heater’s installation may no longer apply, necessitating an upgrade to comply with current requirements.
For a well-informed decision, seek the expertise of a water heater specialist who can evaluate the state of your appliance and provide tailored advice on the most cost-effective and suitable option for your home.
When considering repair or replacement, focus on the long-term advantages, not just immediate expenses. Factor in warranty status, potential reductions in energy bills, and the reassurance that comes with a dependable new water heater.
Consider the Age and Efficiency of the Water Heater
When faced with the decision to repair or replace your water heater, it’s essential to weigh the unit’s age against its performance. Typically, water heaters serve reliably for 8 to 12 years. Beyond this period, they are more susceptible to issues such as leaks and may not operate as economically, leading to steeper utility costs.
To gauge the efficiency of your water heater, examine its Energy Factor (EF) rating. This rating reflects the unit’s ability to convert energy into hot water efficiently. The higher the EF rating, the more efficient the model. Should your water heater exhibit a low EF rating, consider the advantages of a newer model with superior efficiency. Such an upgrade could result in considerable energy savings over time.
Contemporary water heaters boast enhanced insulation, advanced heating components, and refined temperature regulation—innovations that collectively elevate energy conservation. If your current unit predates these technological improvements, you’re likely missing out on significant energy and cost savings.
Before you opt for repairs, it might be beneficial to perform an energy audit or seek advice from a specialist who can project the energy savings and return on investment of a newer, more efficient model. Additionally, explore any available rebates or tax credits for the installation of energy-efficient appliances, which can help offset the initial investment.
By carefully considering both the age and efficiency of your water heater, you can make a well-informed choice. This approach ensures that you balance upfront costs with the enduring value and performance of your home’s water heating system.